http://www.drinksmixer.com/drink1c5d876.html
Friday, March 16, 2012
Thursday, March 1, 2012
Eye Shadow Nail Polish!
What You'll Need:
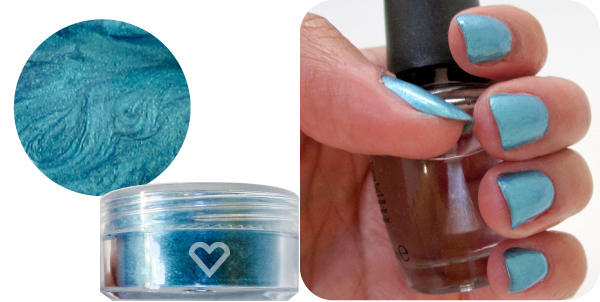
- 1 eye shadow (mineral is preferred because of its finer pigment texture)
- 1 clear nail polish
- 1 small mixing bowl (a disposable paper cup works too)
 Step 1:Start by gently tapping a loose eye shadow into a small bowl. If you are using a solid shadow, scrape it out of the palette using a kitchen knife. Because you want your polish to apply smoothly without bumps, use your knife to smash any larger pigment bits into dust. You should have about a spoonful of powder, which will be enough for all 10 digits. For an exact measurement, tap eye shadow into a spoon before dumping it into the bowl.
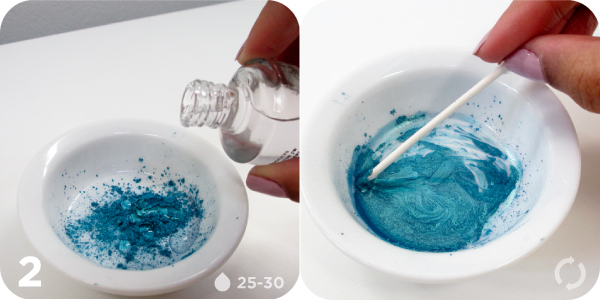
Step 2Use the brush on your clear nail polish to add 25 to 30 drops to the bowl with the eye shadow. If you are feeling more confident, pour drops directly from the bottle. Remove the cotton from one end of a Q-tip and use the stick to stir eye shadow and nail polish together until they blend into a colored liquid form. You should be able to tell if your polish is too thick or too thin and adjust accordingly by adding more powder or more clear polish to the mix. Be sure to blend well. The smoother the formula, the better it will apply to your nails.
Step 3Because the blend is exposed to air, it will dry quickly, so begin to paint your nails right away. Use the brush from your clear nail polish to apply. Don't worry—you can soak the brush in nail polish remover later to remove the polish (it will be as good as new!). Like a high-lacquered finish? Apply a clear topcoat to your manicure.

TOOLS: 2 toothpicks, black nail polish (American Apparel “Hassid”), gold nail polish(American Apparel “Gold Flash”), clear coat.
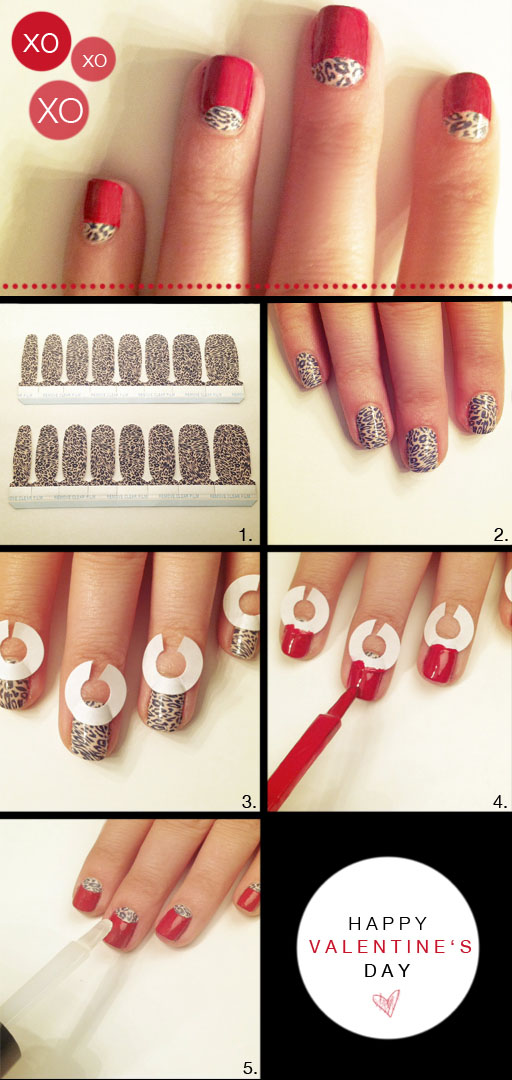
PREP: Use any color your want on the base of your nails. Make sure they’re fully dry before starting on these spots.
- Take your toothpick and tap it on the table or counter a few times to flatten out the tip. That will make your toothpick more like a dotting tool. Flattening the tip will help you pick up a little more nail polish.
- Create 2 little puddles using the gold and black. (Dipping your toothpick in the nail polish bottle is quite messy + you don’t want to leave your nail polish bottle open for too long either.)
- Dip your toothpick into the gold and make a messy oval “blob” shape on your nail.
- After the gold dries, surround them with black. Leave an opening between the black here and there.
- After it dries, take black and start surrounding the shape on one side. Think of it like putting messy parenthesis around your gold blob.
- Now do your messy parenthesis shape on the other side. You can even join them together on one side if you want.
- Do assorted shapes. Leave various gaps in the black polish. None of the spots should look the same. Once everything is dry, go over the spots with a top coat.
http://thebeautydepartment.com/wp-content/uploads/2012/02/TBDmanimondaycheetah.jpg
Subscribe to:
Comments (Atom)