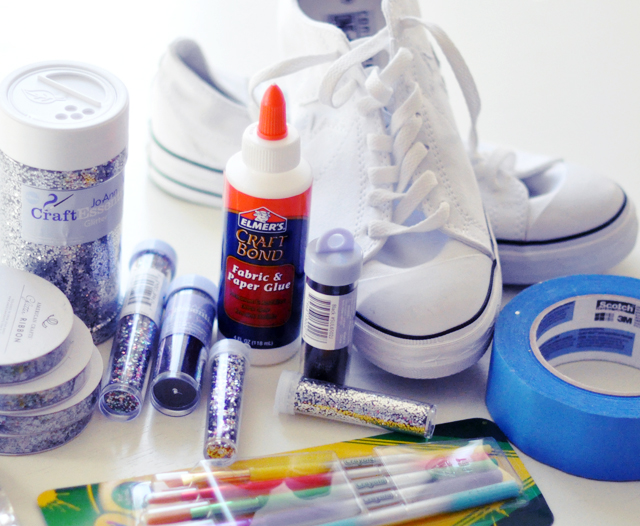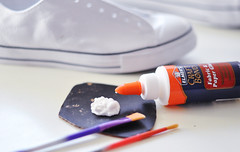
* Squeeze a large amount of fabric glue into a cup or plate. Tape down the sides of your sneakers with your painter's tape. Using a paintbrush, apply a moderately thick layer of glue to the tongue of your shoe.
* Converse/ Shoes
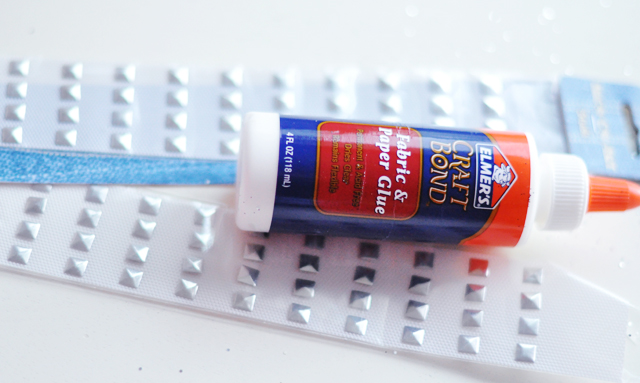
* Fabric glue
* I used Crayola paint brushes to apply the glue.
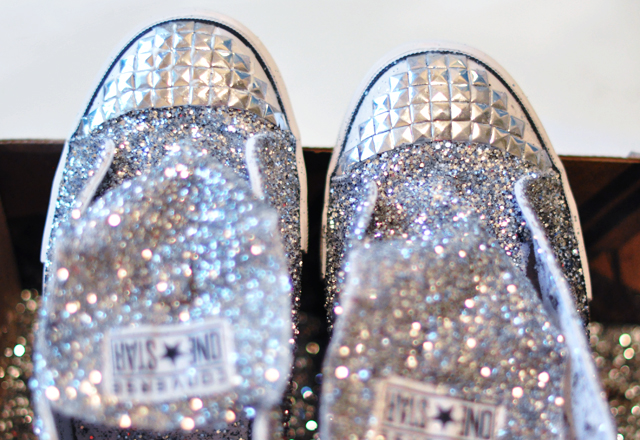
* Silver glitter {I bought an 8oz jar but only used 1/4" of it. 4oz is plenty.
* Fine glitter in black
* Painter's tape
* Iron-on silver pyramid studs {optional}
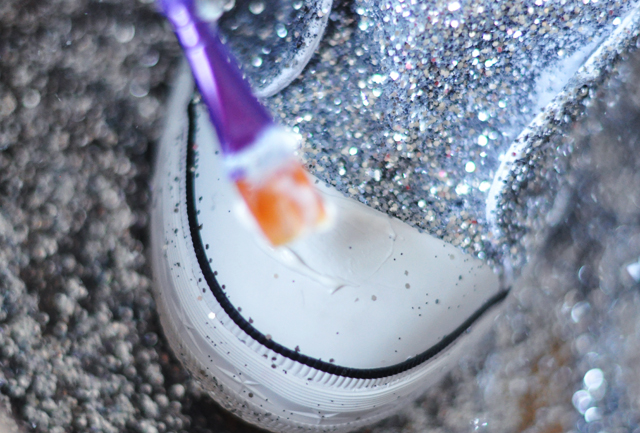
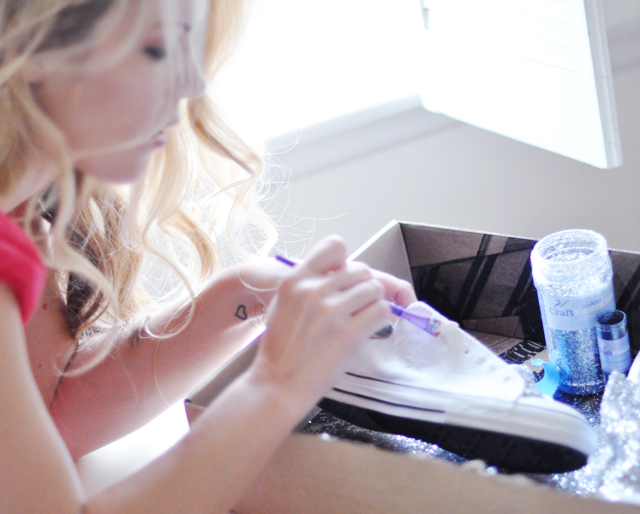
* Place your sneaker in an open box and sprinkle a generous amount of glitter over your glue.
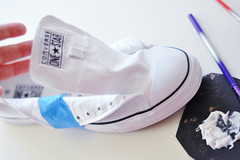
* Once your tongue is almost dry, remove the tape from the sides of your shoe and apply a generous layer of glue to your sides. It's best to do one at a time because the glue dries pretty fast.
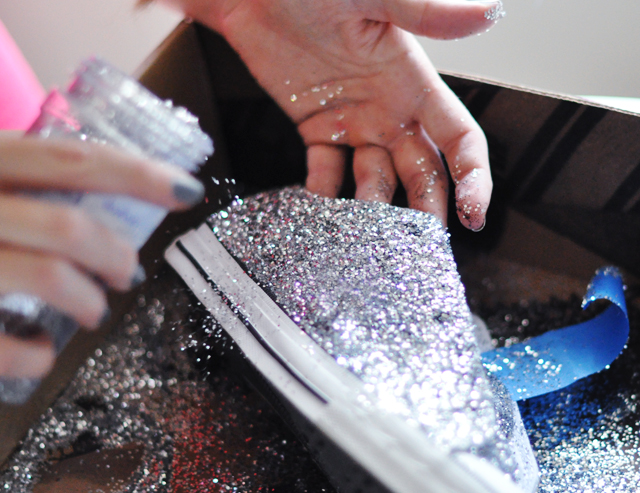
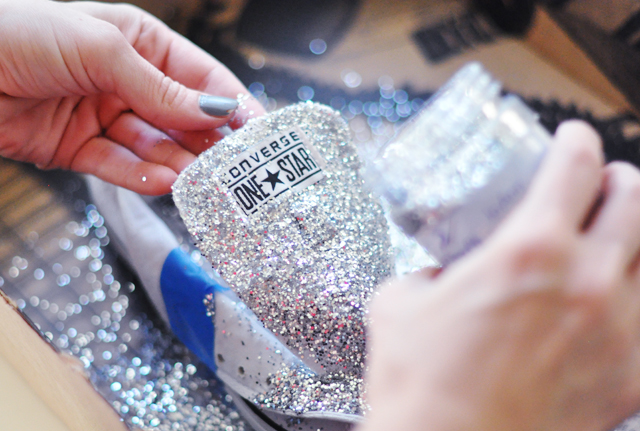
* Sprinkle your larger silver glitter and shake to remove excess.
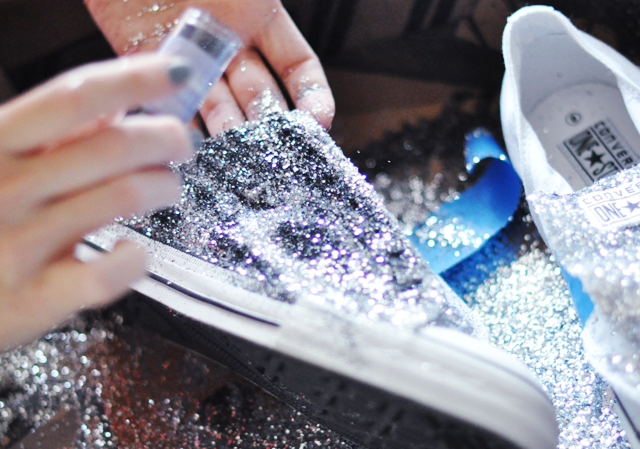
* Since I was trying to mimic the charcoal silver Miu Miu shoes, and couldn't find dark silver glitter, I added fine black glitter on top of my large silver glitter to fill in some of the tiny areas to make it appear darker. {this was my preference. If you can find a darker silver glitter, this step is unnecessary}
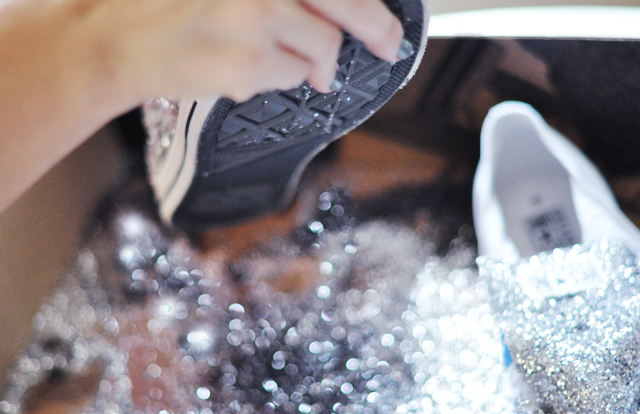
* Shake your shoe and allow the black fine glitter to settle and discard any unwanted silver glitter. If you missed any spots, now is your chance to add a little more glue and fill them in.
*OPTIONAL
* To create a faux steel toe, I used small iron-on pyramid studs.
* Paint a generous amount of glue on the rubber toe of your sneaker. You'll have to work quickly because it dries fast!
* Begin adding your studs at the center where the rubber meets the glitter and work out from there to either of the edges. Then create a sort of T by placing studs in a row down to the tip toe of your shoe and work out from there.
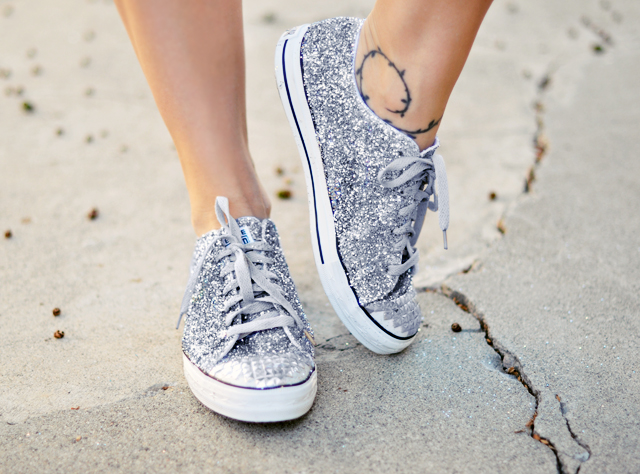
*My advice if you want a darker shoe lace is to just buy them or use a satin ribbon instead.


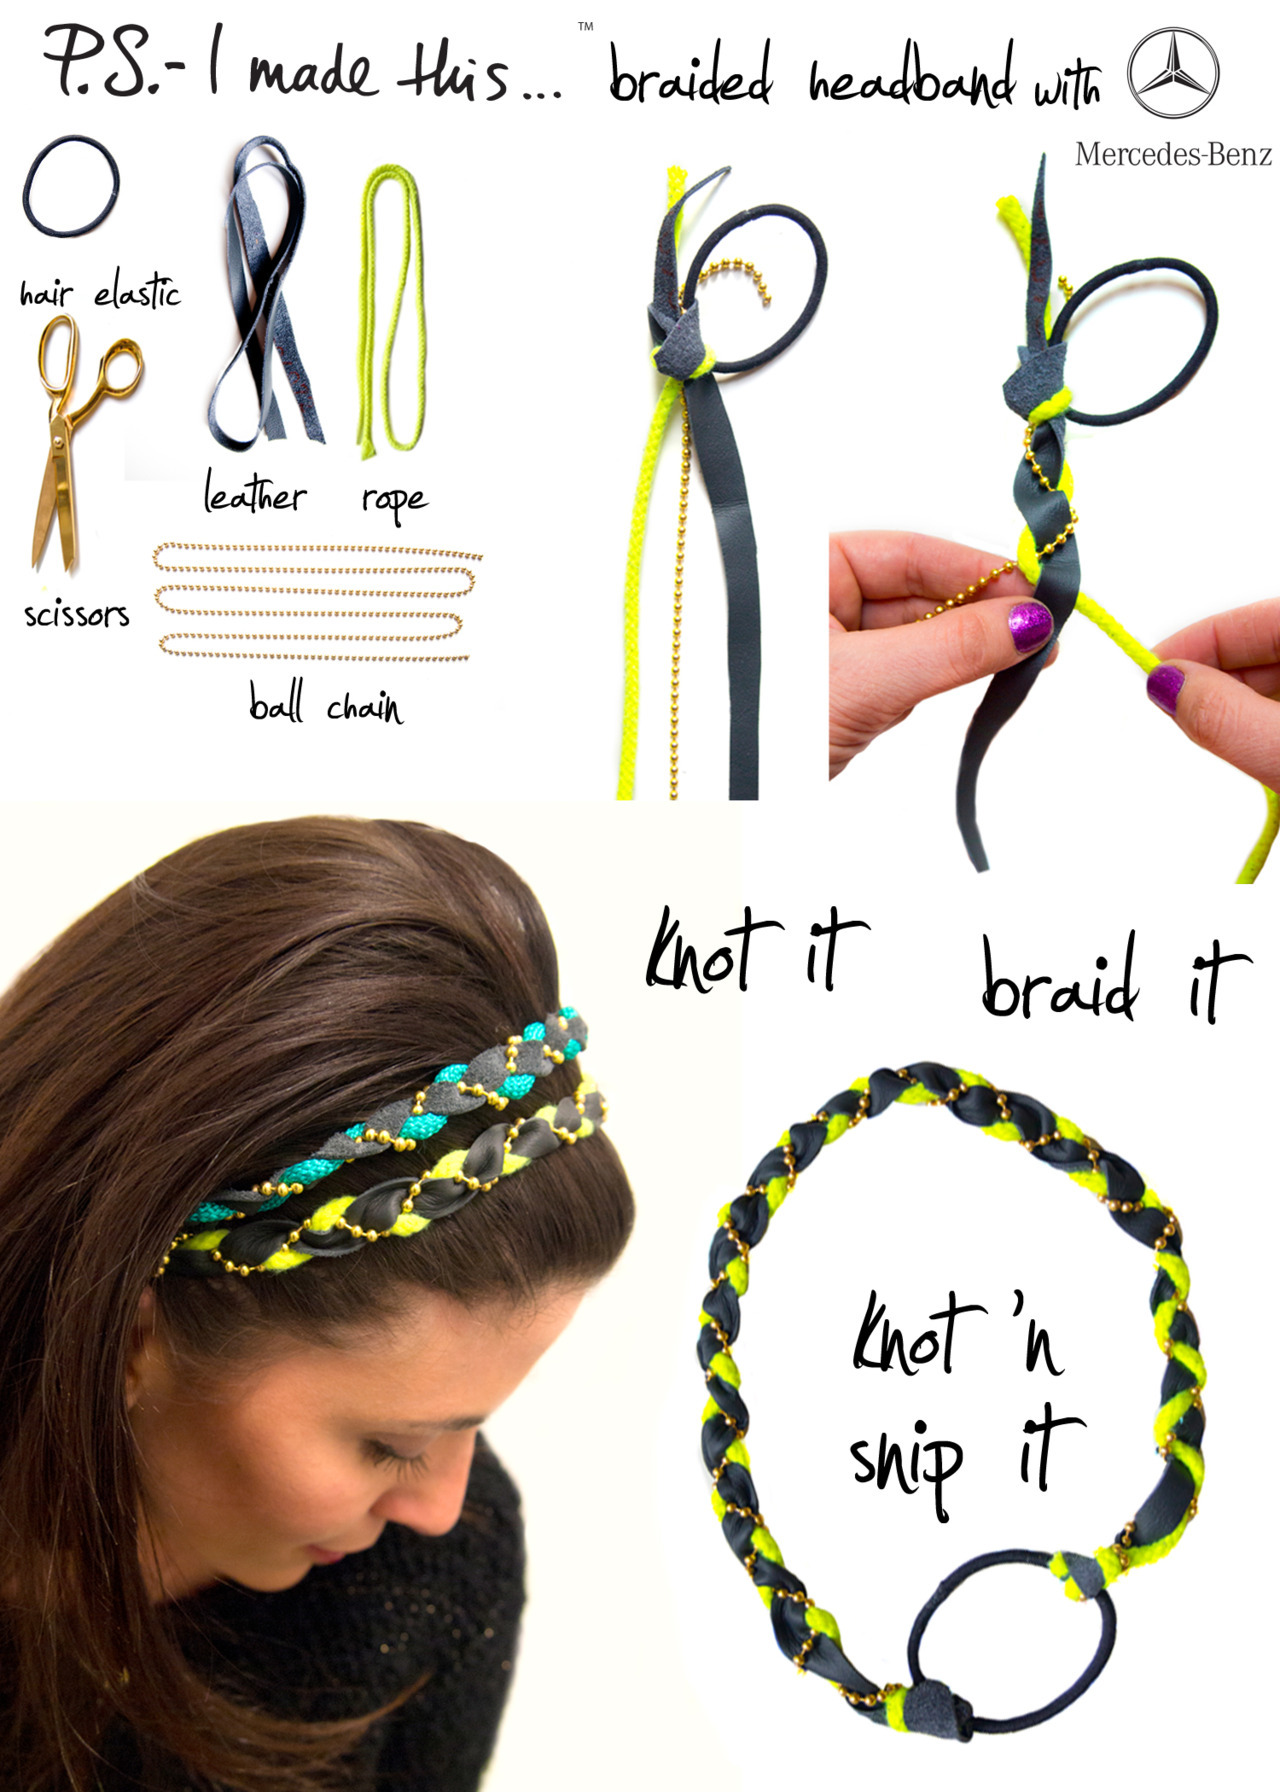
 To create you own version of this macrame-style rope necklace, grab a spool of rope and loop around your thumb. Weave over and under your fingers, back and forth until you create 2 rows of rope of each finger. Remove the bottom string over the top on each finger, until you leave just one row left. Continue to weave over and under, always creating 2 rows of rope and pulling the bottom rope over the top. After you’ve created your woven design, remove from the fingers, loop the strand through all the finger holes, add beads and chain- and you’re ready to roll!
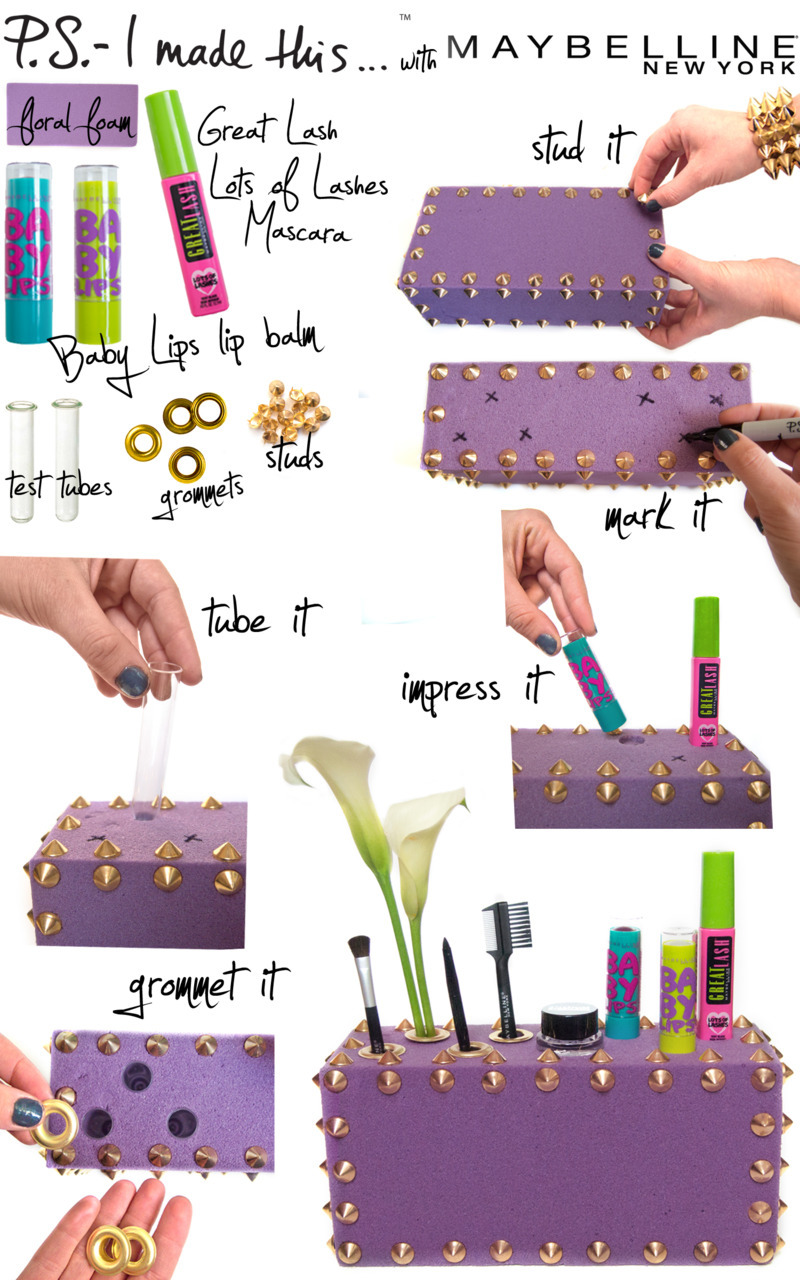 -To create, use a block of floral foam and stud it up!